7zip Context Menu to Archive & Delete a Folder
I like to archive old projects using 7zip to save space and make backups easier to manage. The GUI makes it very easy to open 7zip archives, find files, and even open specific files in the archive without decompressing everything. To make this process easier I created a right-click context menu button that archives the folder then deletes the original files.
Step 1: Install 7zip
Install 7zip from the official website.
Step 2: Add Registry Changes
Windows' right click context menu is configured in the registry. You can download the registry file and apply the settings or add the changes manually.
Step 2a: Use the file
Download and open the .reg file to add the keys to the registry. Browsers can block the file download so you may have to manually approve the download. Registry files can be dangerous, use them with caution. You can open the file in any text editor and see what keys it adds to the registry.
          [HKEY_CLASSES_ROOT\Directory\shell\Archive and Delete]
          "Icon"="\"C:\\Windows\\SystemResources\\shell32.dll.mun\",3"
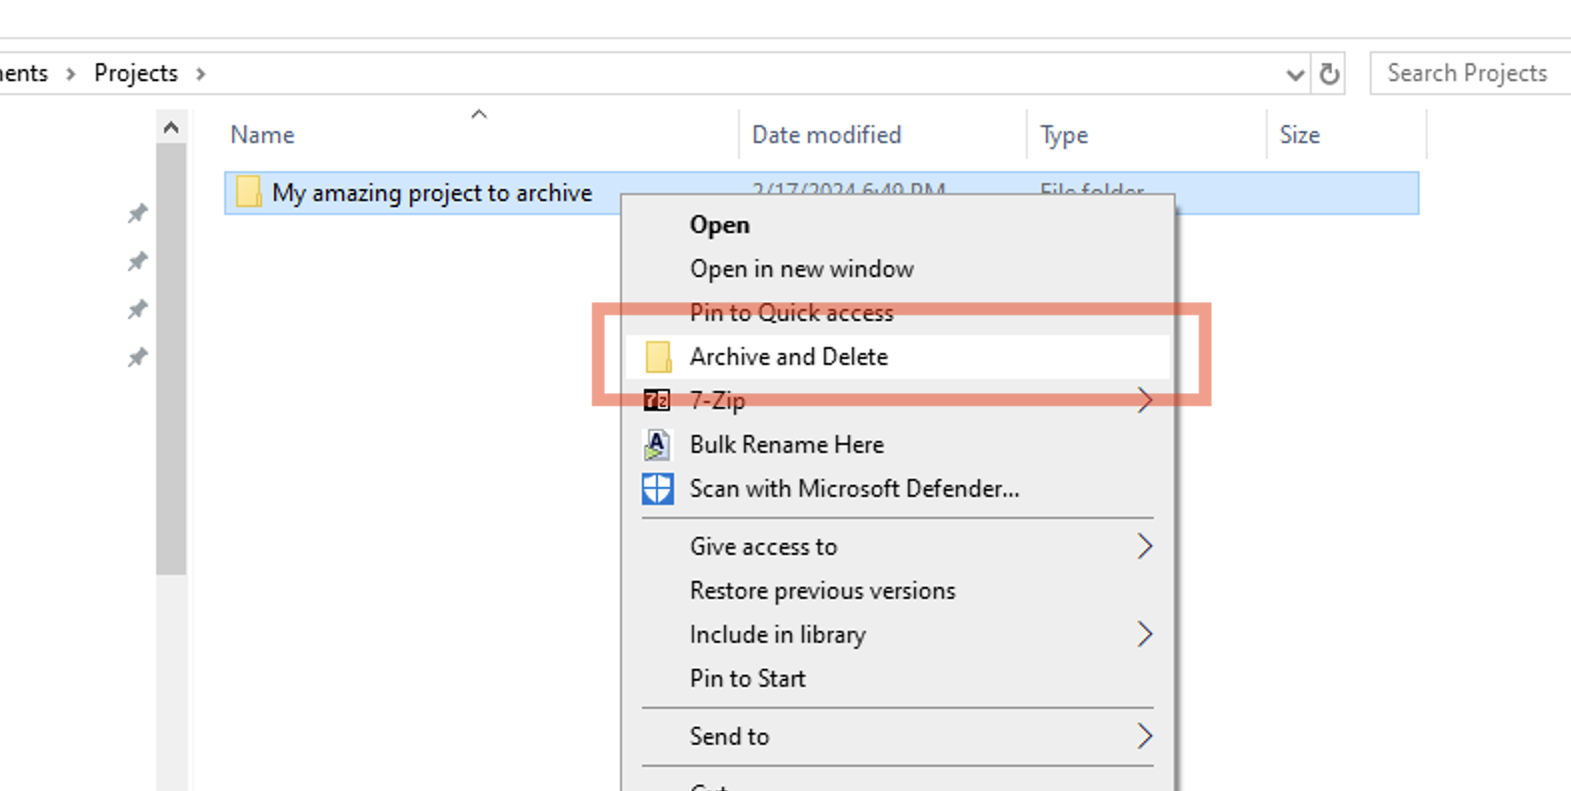
This key creates the context menu entry whenever you right-click on a folder in Explorer. It also sets the icon to a folder.
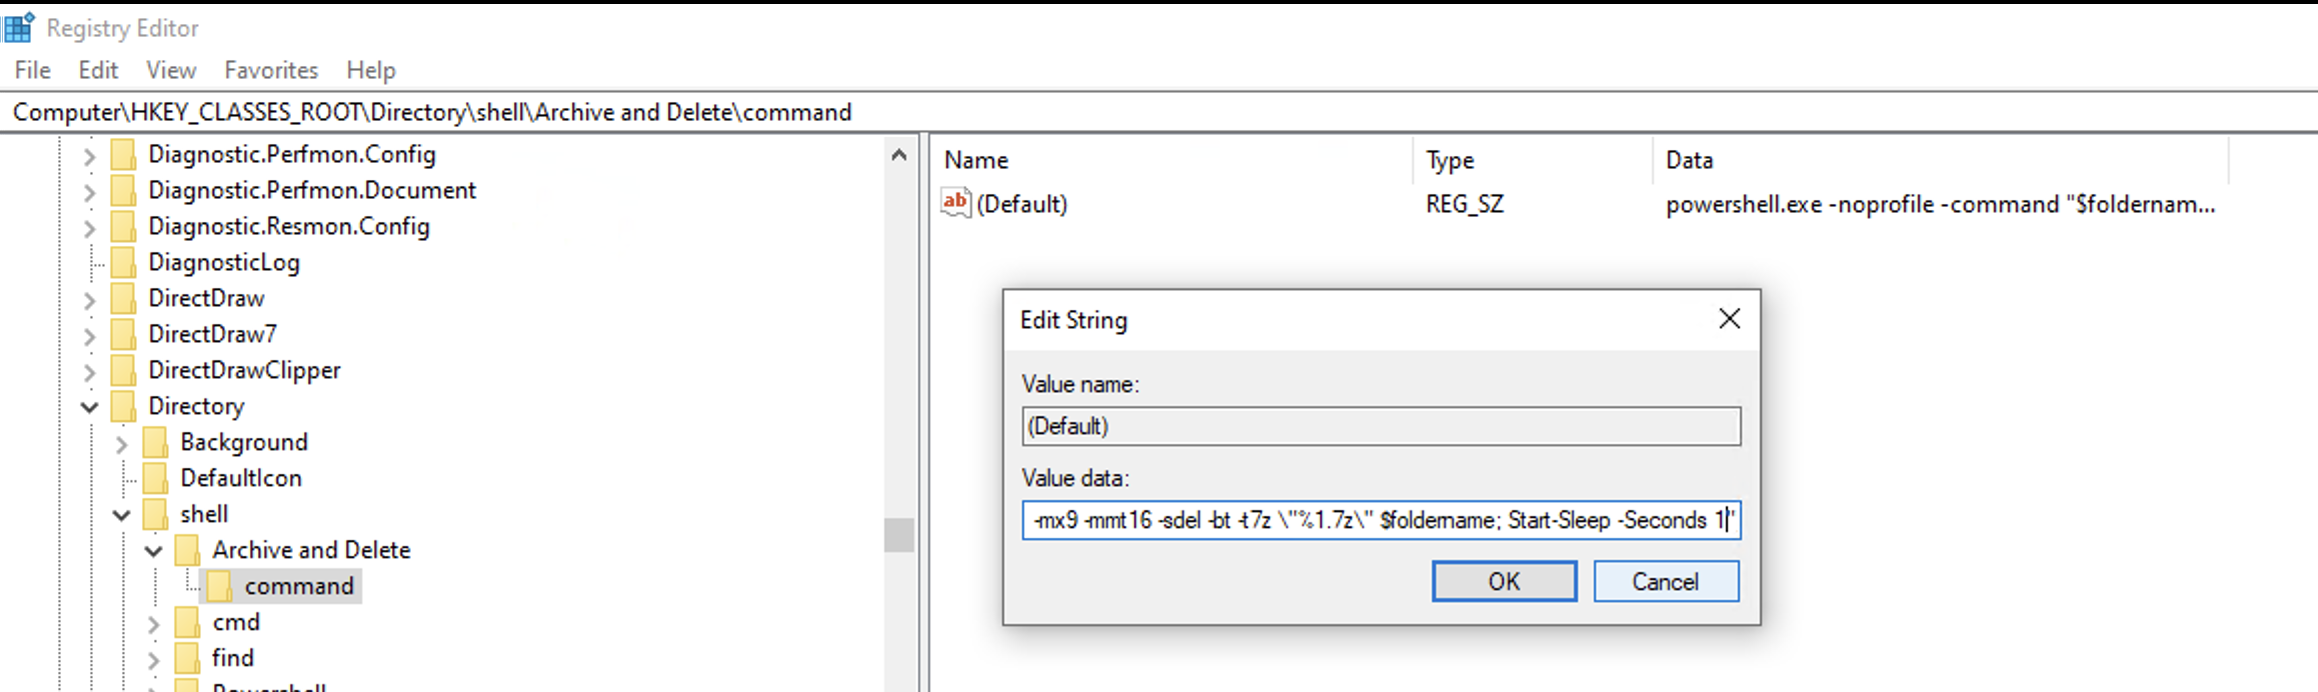
          [HKEY_CLASSES_ROOT\Directory\shell\Archive and Delete\command]
          @="powershell.exe -noprofile -command \"$foldername = Split-Path \\\"%1\\\" -Leaf; & \\\"c:\\Program Files\\7-Zip\\7z.exe\\\" a -mx9 -mmt16 -sdel -bt -t7z \\\"%1.7z\\\" $foldername; Start-Sleep -Seconds 1\""
This key defines the command that is run when you click the context menu button. It basically just uses the command line version of 7zip and passes the arguments to configure the archive process. Change the arguments to customize the command (what's shown uses maximum compression and 16 threads, you might want something different).
Step 2b: Add Keys Manually
If you'd rather not use the .reg file you can add the keys manually. Open regedit.exe and add the following two keys.
Under HKEY_CLASSES_ROOT\Directory\shell\Archive and Delete add a new key named "Archive and Delete" or whatever you want the context menu entry to show up as. A folder will appear under "shell" with that name. Open the folder and create a new string value with a name of Icon and data of "C:\Windows\SystemResources\shell32.dll.mun",3.

In the same Archive and Delete key you just made, create a new sub key named command. Add a string value, leave the name blank, and add the following command: powershell.exe -noprofile -command "$foldername = Split-Path \"%1\" -Leaf; & \"c:\Program Files\7-Zip\7z.exe\" a -mx9 -mmt16 -sdel -bt -t7z \"%1.7z\" $foldername; Start-Sleep -Seconds 1"
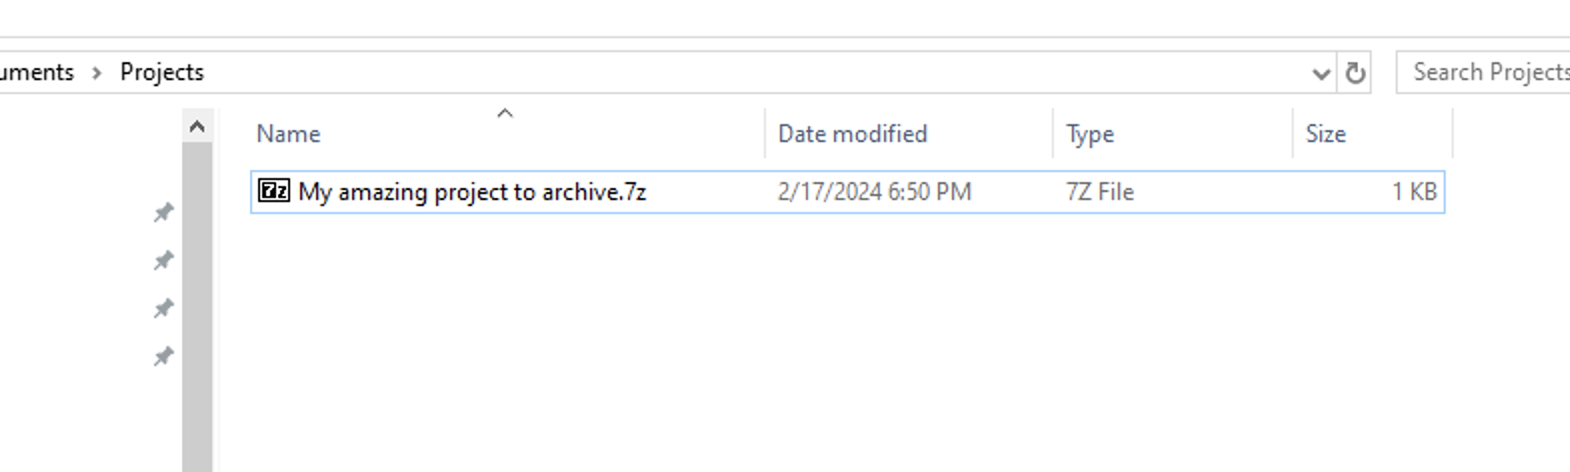
Step 3: Archive Stuff
Now you can right click on any folder and quickly turn it into a highly compressed 7zip archive!